Timesheet
The Timesheet is a full-page weekly view that shows everything you logged as an issue × day grid — one week at a time. Review your whole week at a glance and add, edit, and delete time entries inline, without opening each issue.
It brings together both kinds of time on your site in one place:
- Native Jira time tracking — the same worklogs you see on an issue's Work log tab.
- Time Tracking fields from this app — each field (for example Dev Estimate or QA Estimate) tracked separately, with its own estimate, spent, and remaining.
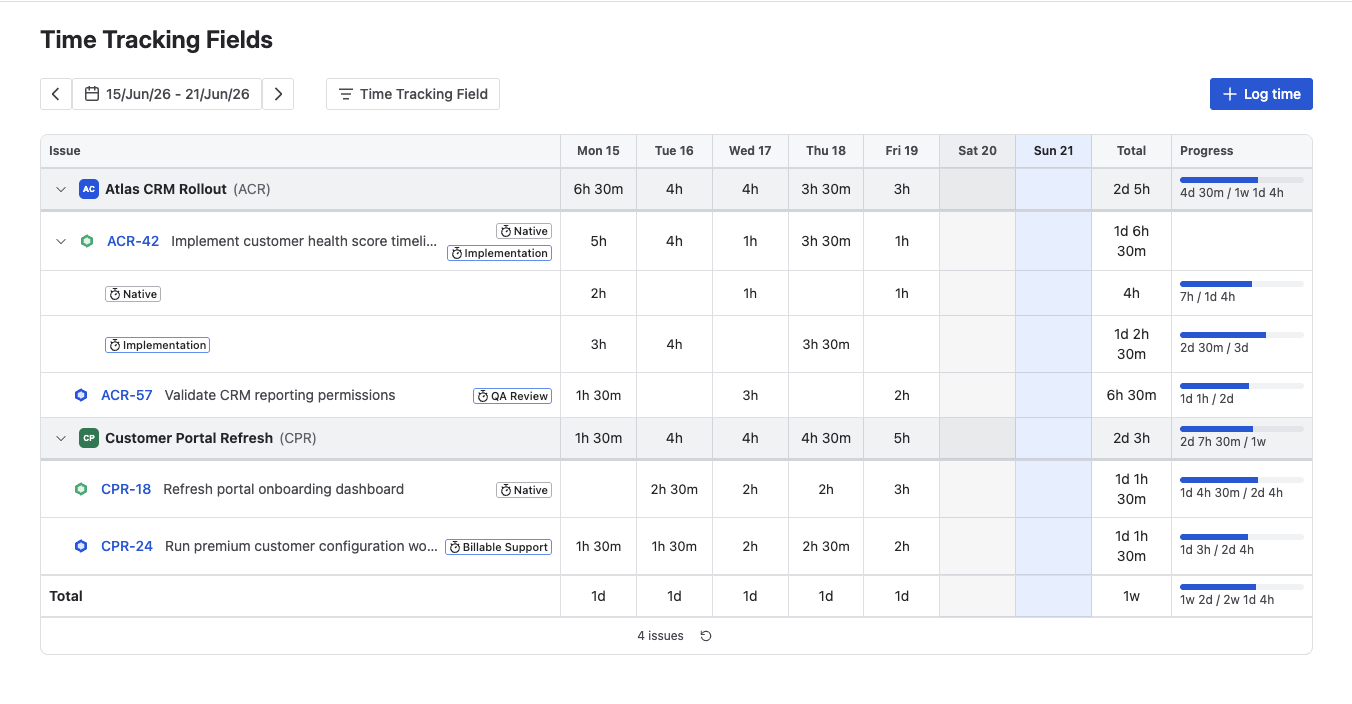
A week of logged time as an issue × day grid, with per-field Progress bars on the right.
Where to find it
Open it from the top navigation: Apps → Time Tracking Fields. The page always shows your own logged time for the selected week ("My week") — there is no per-user or team view.
Adding, editing, or deleting time requires the Jira Work on issues permission on that issue. Without it, the editor shows an inline message and keeps what you typed on screen.
Reading your week
Each row pairs one issue with one target — either Native time tracking or a specific Time Tracking field. A single issue can therefore appear on several rows: one for native time, and one for each field you logged against it.
Columns are the seven days of the week, Monday to Sunday. Every cell shows that day's total for the row, and the grid totals in every direction:
- a daily total for each column,
- a row total for each issue/target,
- project and issue subtotals, and
- a week total for the whole grid.
The current day is highlighted and weekends are de-emphasized so the working week stands out.
Project → issue tree
Rows are grouped into a two-level tree so a busy week stays readable:
- A project header (with a chevron to collapse it) shows the project and its aggregated daily and weekly totals.
- When an issue has two or more targets, an issue header shows the issue once — type, key, and summary — with its own aggregated totals, and the per-target rows nest beneath it showing just their target badge. So "multiple fields on one issue" reads as a single issue, not as duplicate rows. Collapse the issue to its header if you only want the summary; the issue key still links through to the issue.
- An issue with a single target is shown as one ordinary row.
Collapsed projects and issues stay collapsed as you move between weeks, and reset when you reload the page.
The Progress column
The Progress column shows how each issue is tracking against its estimate — a budget bar comparing time spent with the original estimate for that row. The figures are cumulative across the whole life of the work, not just the current week, so you can tell at a glance whether something is on track while you fill in your time.
- When work goes over budget, the bar turns red and shows how far over it is.
- When time has been logged but no estimate was set, the row shows the time spent without a bar.
- When there is nothing to compare against, the column stays empty.
Hover over a bar to see the full estimate, time spent, and remaining time. These totals also roll up to each project header and to the grand total in the footer.
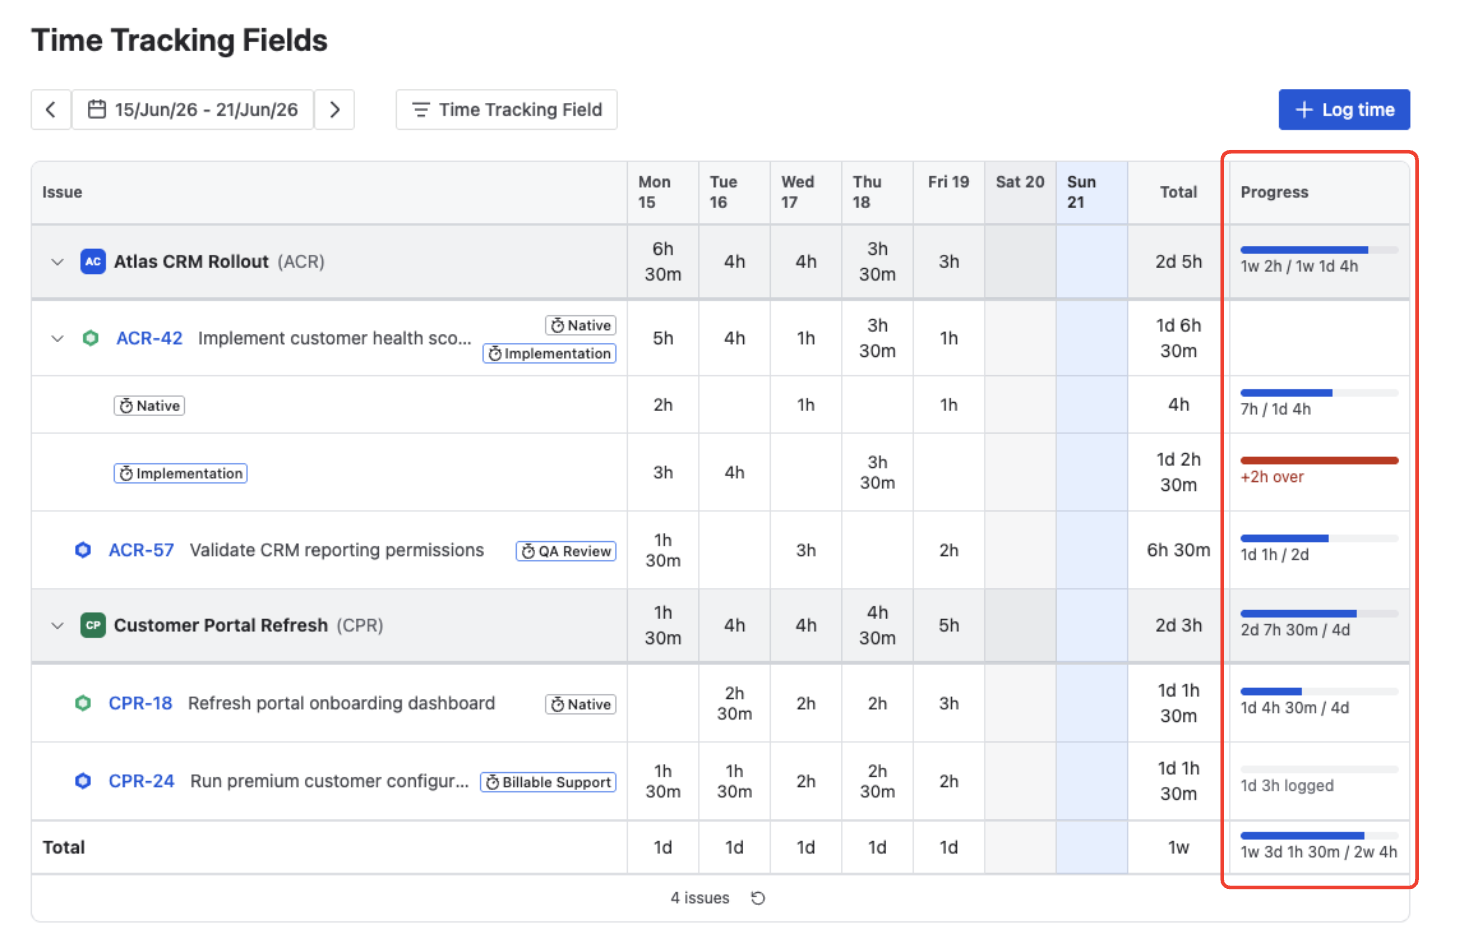
The Progress column — each row's time spent against its estimate, with over-budget rows flagged in red.
Filtering by Time Tracking field
A filter to the right of the week navigation narrows the grid by target:
- It lists the distinct targets present in the current week — Native first, then field names A→Z — as multi-select checkboxes (the selection is a union).
- Nothing checked means the filter is off (the default). When a filter is active, a count badge appears on the filter button.
- Filtering is applied before totals are calculated, so the daily and weekly totals, the footer, and the issue count all reflect what you're seeing. Your selection persists as you change weeks and resets on reload.
- If the filter hides every row, a "No rows match…" message offers a Clear filter action.
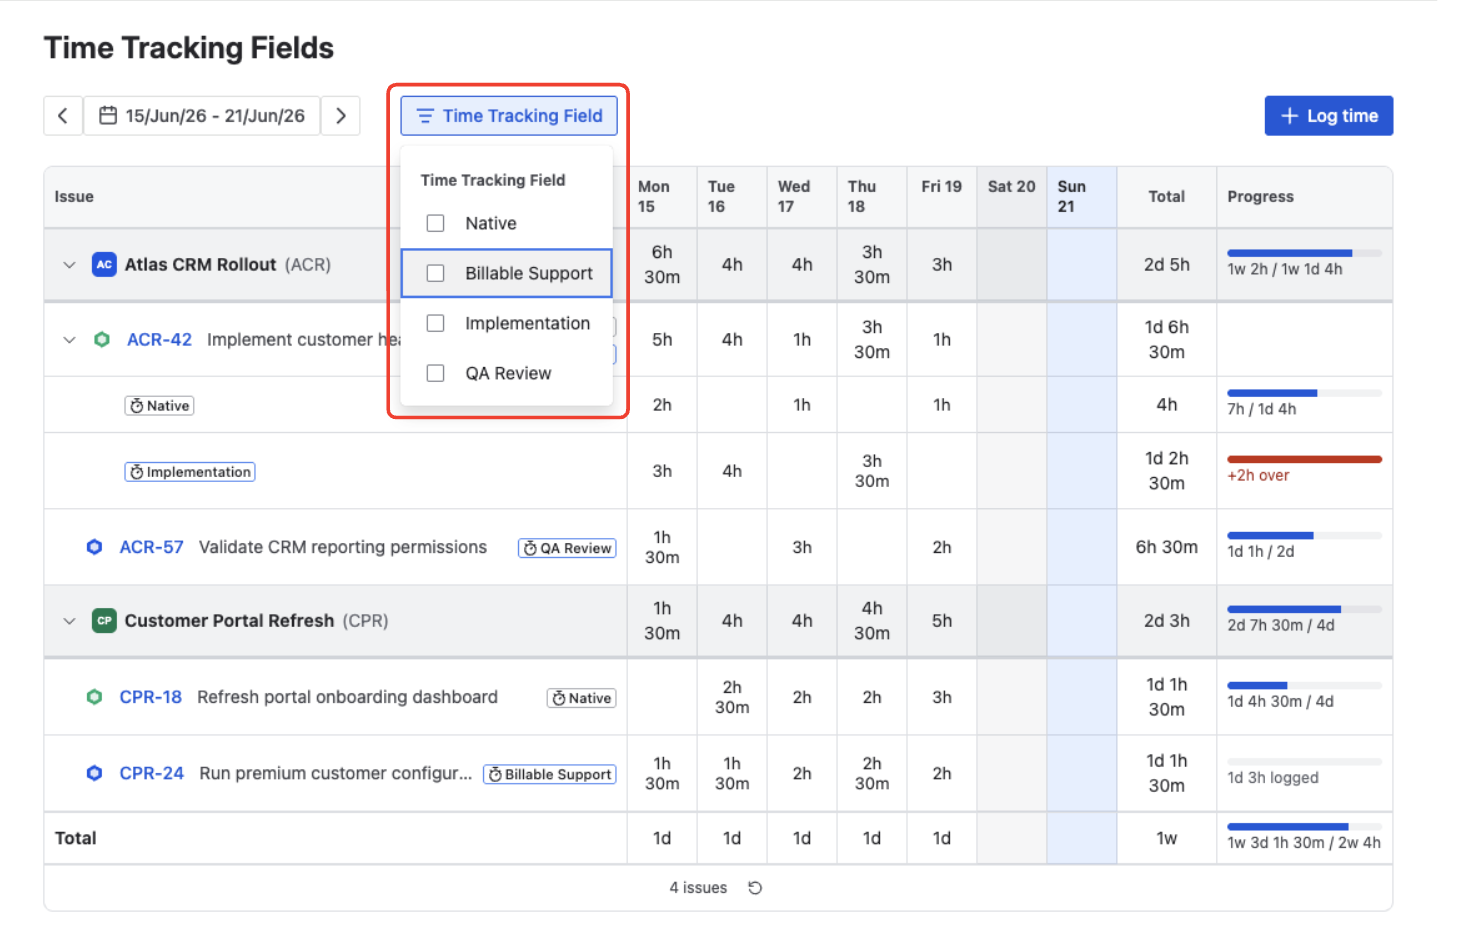
Filtering the week by target — choose Native and any Time Tracking fields to narrow the grid.
Logging time
There are two ways to add time:
Click Log time
Click Log time in the header (it's also the call to action on an empty week).
Pick the issue
Search for the issue by key or summary and select it.
Fill in the worklog
Complete the log-work form (see the fields below) and Save. The entry appears in the grid and the totals update.
You can also click an empty day cell to open the same form pre-filled with that issue, target, and day.
The form has two variants, depending on the row's target:
| Target | What you fill in |
|---|---|
| Time Tracking field | A short progress summary; Time spent (required); the Original and Remaining estimate when editing them is allowed; Date started and Time started; Work description; and a Billable toggle. |
| Native time tracking | Time spent (required); Date started and Time started; Work description. No estimate fields and no Billable toggle — native worklogs have no billable concept. |
Time spent is required and must be greater than zero — logging from the Timesheet always creates a worklog. The remaining estimate adjusts automatically when you save.
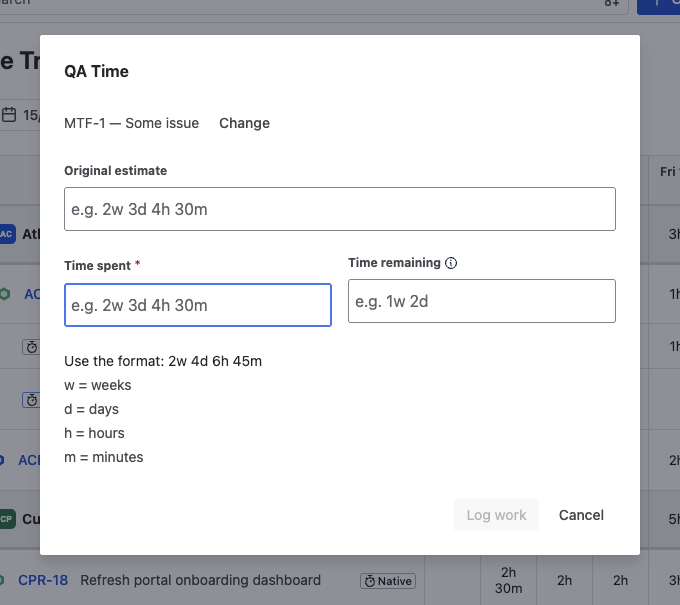
Logging time against a Time Tracking field — enter time spent, and adjust the estimate or remaining time if needed.
Editing and deleting time
Click a day cell that already has time:
- One entry opens the Edit worklog dialog directly.
- Two or more entries open a small popup listing that day's entries (duration, description, and a billable badge); click one to open its Edit dialog.
The Edit worklog dialog holds the same fields as the log-time form; its footer is Save · Delete · Cancel (Delete asks you to confirm).
Editing keeps an entry on its original day. To move time to another day, delete the entry and add a new one on the day you want.