Quick Guide
This guide takes you from installing Storage Saver to a first moved file that you can see on its work item. It follows one example throughout: a project with a work item that holds a few large video and PDF files.
Before you start
Who can do this. A Jira administrator, since the admin page opens only for Jira administrators. Jira's own permissions apply too: picking files on the project page takes permission to delete those attachments (Delete all attachments, or Delete own attachments for files you added yourself), and Jira offers to add an app's panel only to people who can edit the work item.
Decide on a minimum age. By default a file can be moved on the day it was uploaded. A moved file is no longer a Jira attachment, so automation rules, integrations and other apps that read attachments on recent work items no longer see it. If anything on your site does that, enter a number of days in Do not move files newer than this many days on the admin page's Settings tab, and press Save before your first move. New moves use it at once; for the report's figures to count with it too, press Scan again on the Overview tab once the first scan has finished. See Settings.
From install to the first move
Install Storage Saver
Install Storage Saver from the Atlassian Marketplace. The first storage scan starts on its own.
Wait for the first scan
Go to Jira settings → Apps → Storage Saver. The Overview tab shows the scan's progress. It runs in the background, so you can leave the page. If the tab shows No scan has run yet, press Start scan.
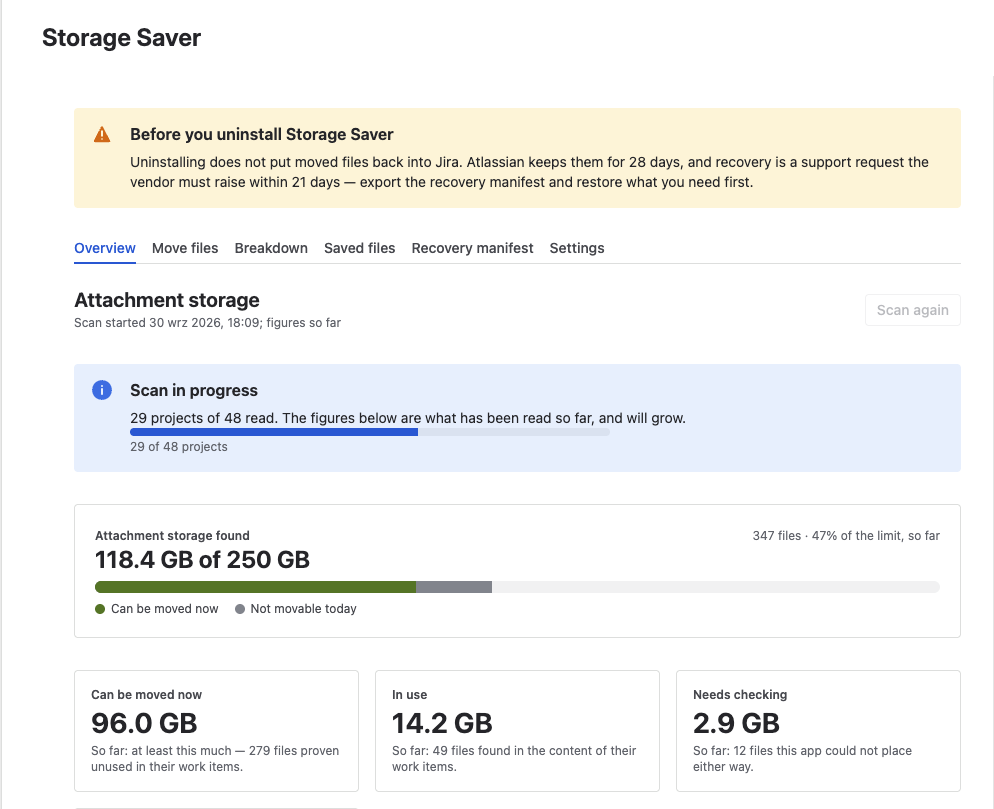
The first scan in progress: the figures grow as projects are read
Read the Overview tab
When the scan finishes, the tiles sort the files it found:
- Can be moved now: not used in their work item's text.
- In use: found in the text, such as an image pasted into a comment. They stay in Jira.
- Needs checking: checked when moved, and moved only if not in use.
The meter and the forecast compare your storage with the site's limit, 250 GB unless you change it on the Settings tab. See Storage Report.
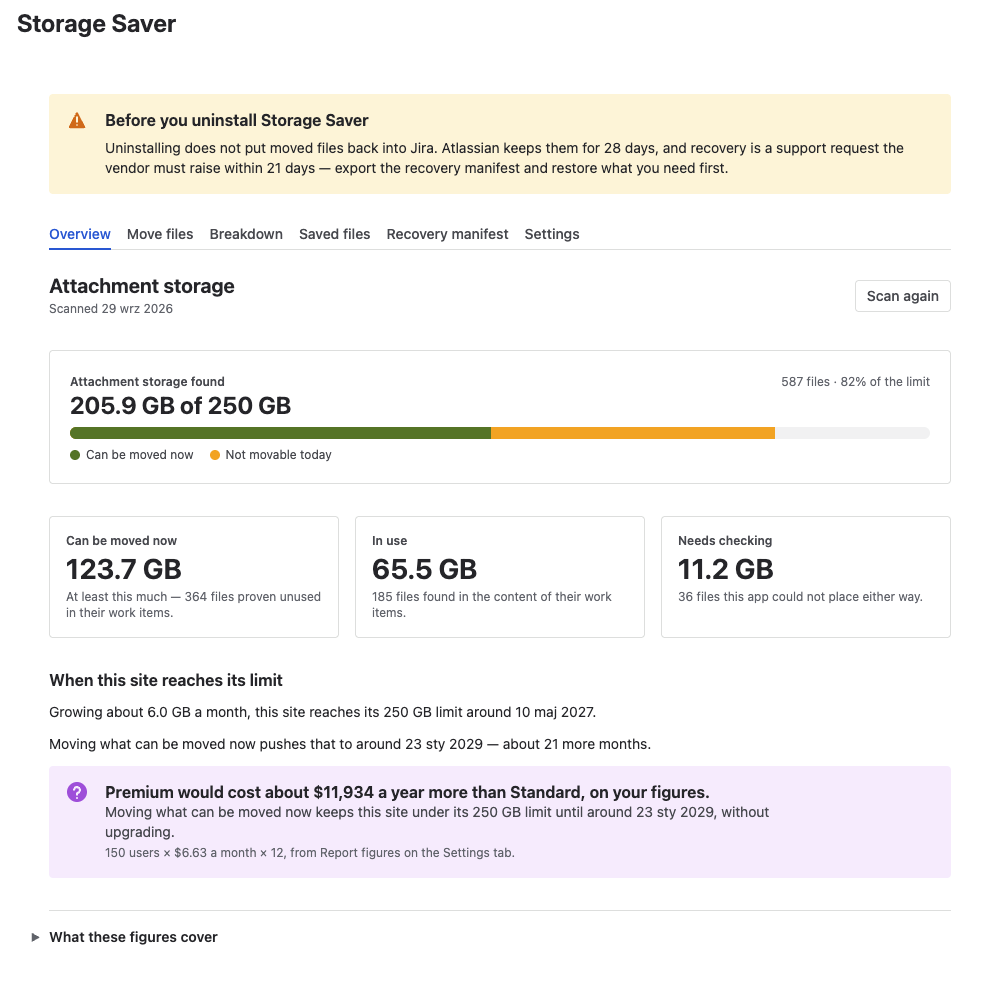
The Overview tab after the first scan
Add the panel first
Open the work item, select View app actions under its title, then Storage Saver. The panel is where people find moved files: without it, they simply disappear from the work item's attachments. Before moving a whole project, show the panel on all of its work items at once ( see Work Item Panel).
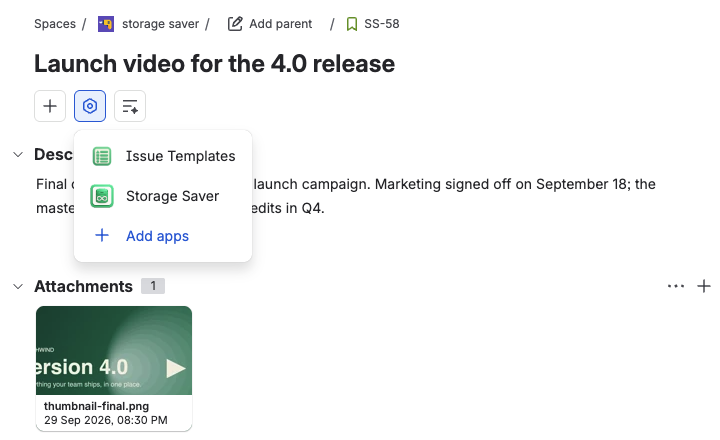
Add the Storage Saver panel from View app actions
Move the work item's files
In the project's Space settings, select Storage Saver, then the Move files tile. Tick the work item's large files, up to 25 at a time, and press the Move button. See Project Page.
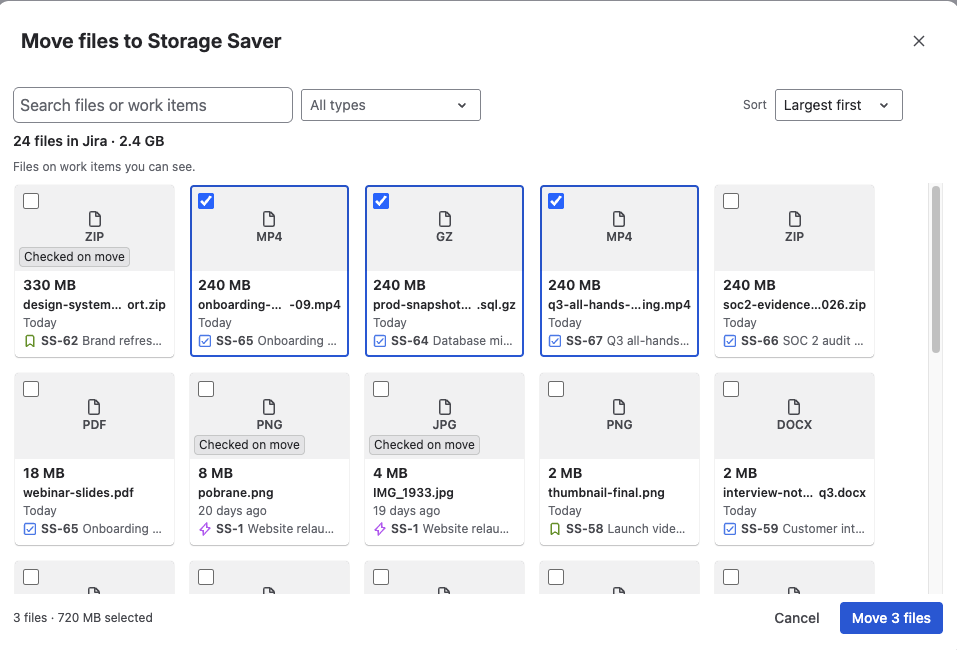
Pick the files to move on the project page
To move every file of a project at once instead, use the admin page's Move files tab: see Move Whole Projects.
Every file is checked again before it moves.
Check the result
The panel lists the moved files, largest first, with a total such as 3 files · 624 MB saved. Download any file from its tile. See Work Item Panel.
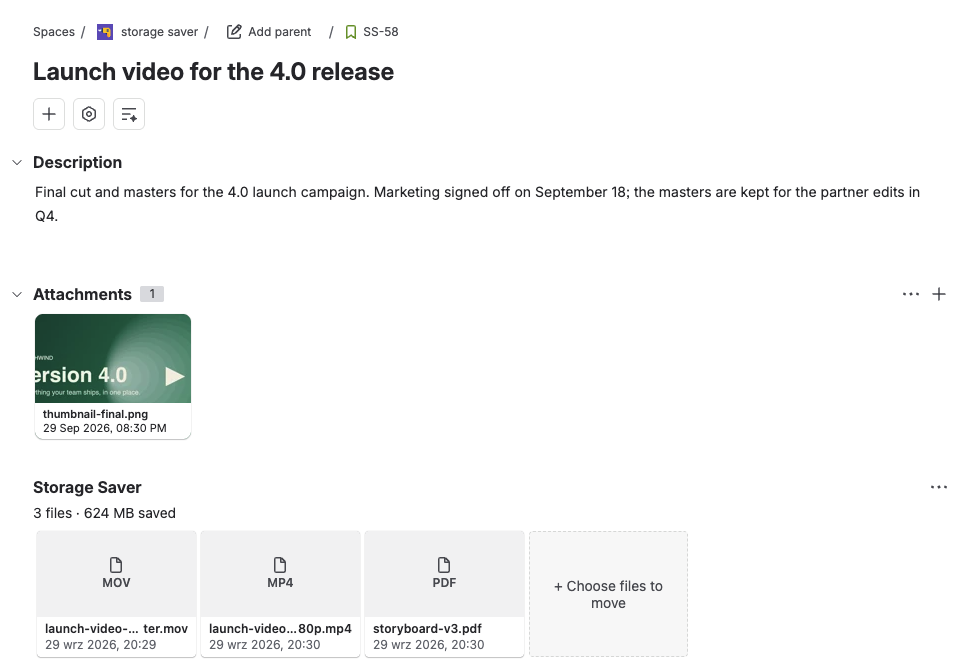
The moved files on their work item
Expected result
The Overview tab shows the storage report for the whole site. The work item's large files are moved out of Jira's storage and listed on its Storage Saver panel, where anyone who can see the work item can download them and people who may add attachments to it can restore them. Jira's own storage figure is not updated at the moment of the move; it catches up later.