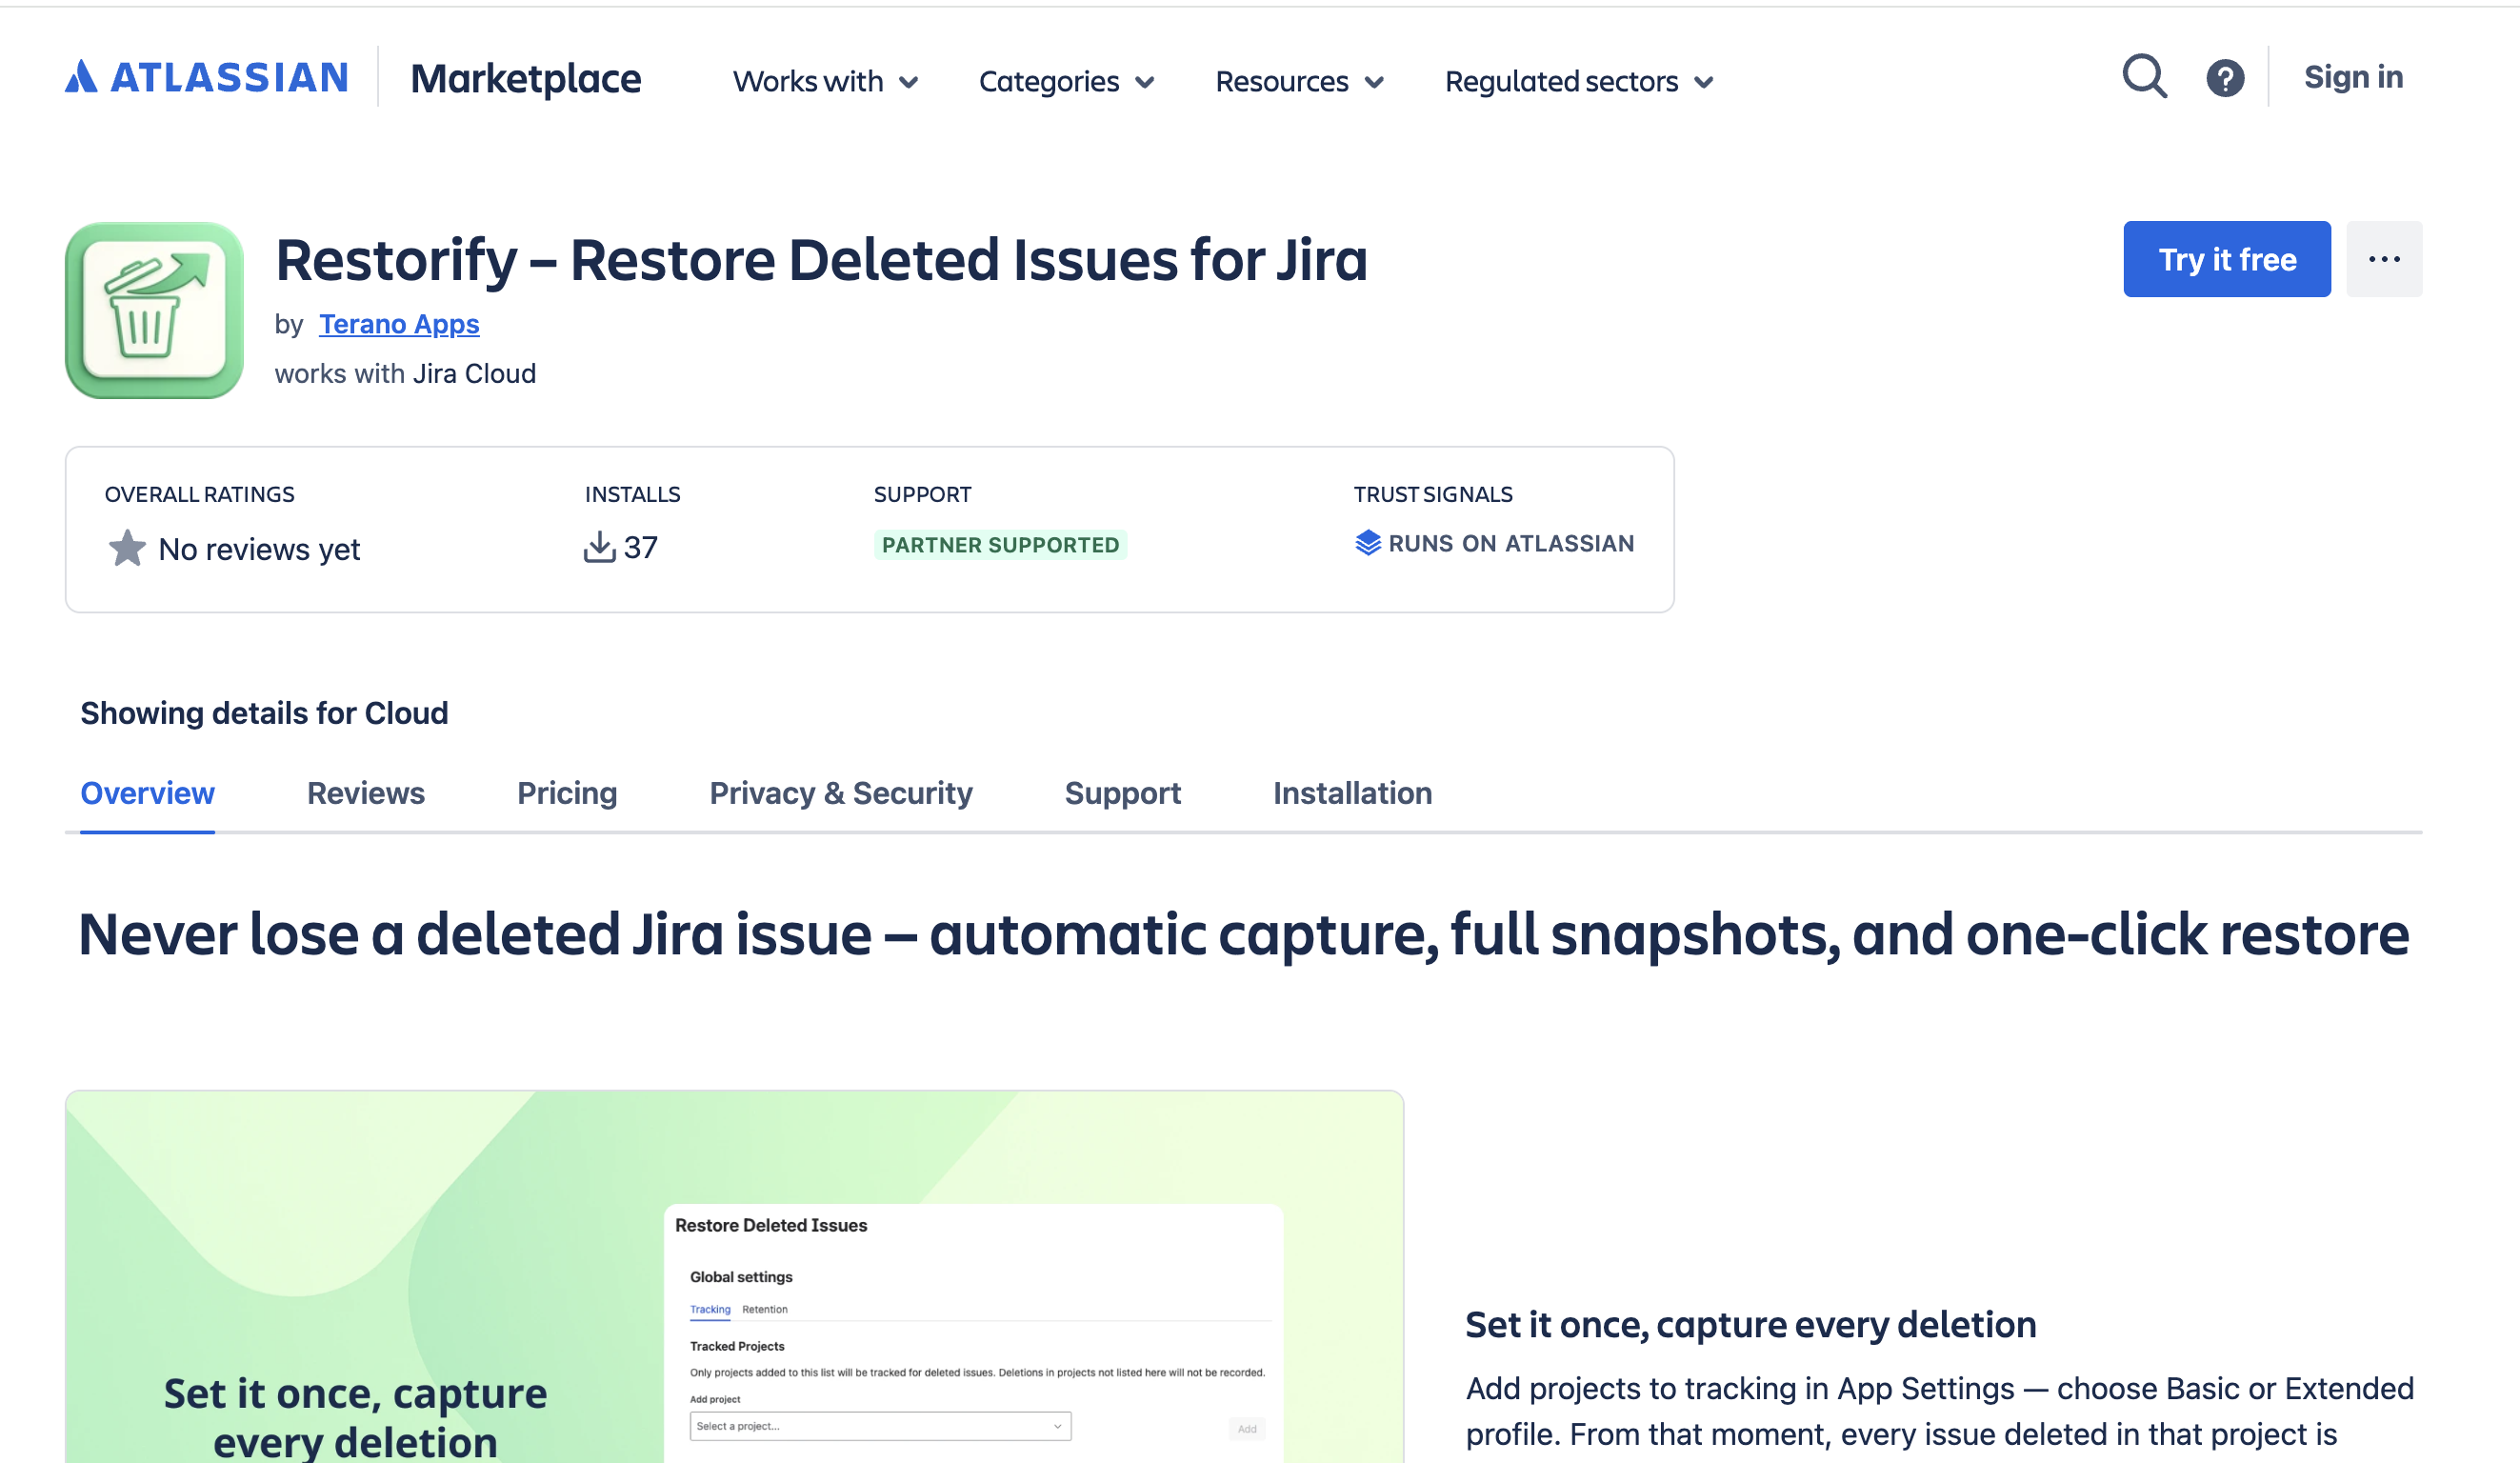
Quick Guide
Get up and running in under 10 minutes. This guide walks you through the complete flow — from installation to your first successful restore.
Estimated time: 5–10 minutes · Role: Jira Administrator
How it works
Part 1 — Configuration
Install from the Atlassian Marketplace
Go to the Restorify listing on the Atlassian Marketplace and click Try it free. Atlassian handles the installation directly into your Jira Cloud site.
After installation, the app is available under Jira Settings → Marketplace Apps.
Open App Settings
Navigate to Jira Settings (cog icon, top right) → Apps → Restorify – Restore Deleted Issues.
This is the administration panel — the central place for configuring tracking scope, retention policy, and monitoring system health.

Add your first project to tracking
In App Settings, go to the Tracking tab and click Add project.
Select the project you want to protect from the dropdown and choose a tracking profile:
- Basic — captures all issue fields, description, and custom fields. Recommended for most projects. Works immediately, even for issues that existed before the app was installed.
- Extended — additionally captures comments, worklogs, issue links, and subtasks. Recommended for production or compliance-sensitive projects. See Tracking Profiles for details.
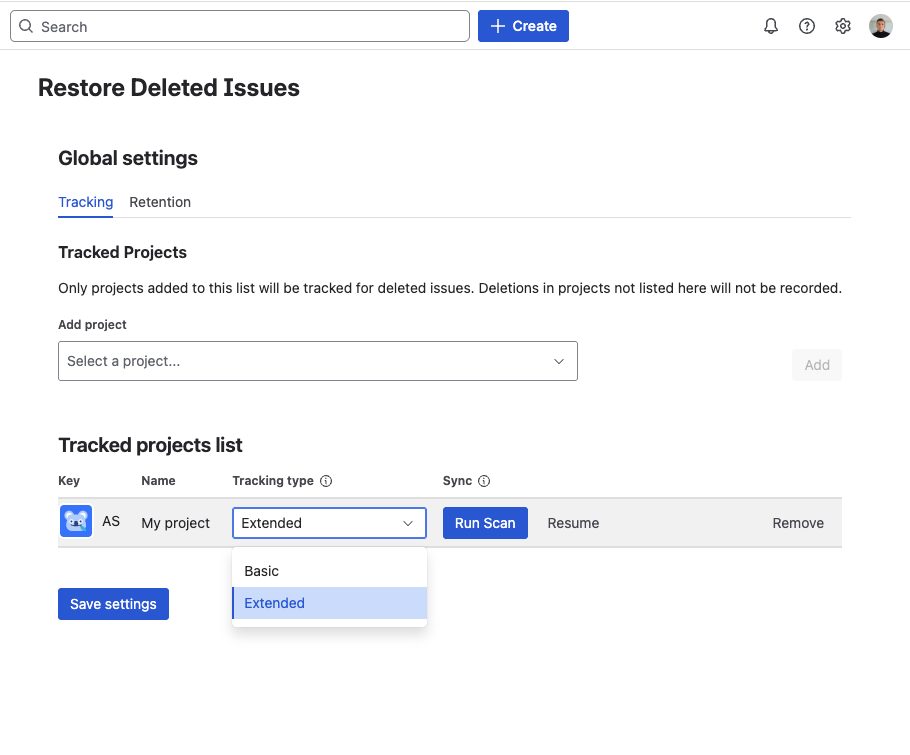
Tracking is now active. Any issue deleted in this project from this moment on will be automatically captured.
tipIf you enabled Extended profile on a project with existing issues, run a Project Scan to build snapshots for issues that were created before the app was installed. See step 4.
Run Project Scan (Extended profile only)
In Extended mode, the app builds snapshots by listening to issue create and update events. Issues that haven't been touched since the app was installed won't have an Extended snapshot yet.
To cover them, go to the project row in the Tracking tab and click Run scan. The scan runs in the background — you can safely close the browser tab while it's running.
 tip
tipYou only need to run this once per project. After the scan completes, all subsequent creates and updates are captured automatically.
Part 2 — Try it out
Delete a test issue to verify tracking
In Jira, open any issue in your tracked project and delete it (issue actions menu → Delete).
Go back to the app and open the Deleted Issues panel (accessible from the project sidebar or from App Settings). The deleted issue should appear in the list within seconds.
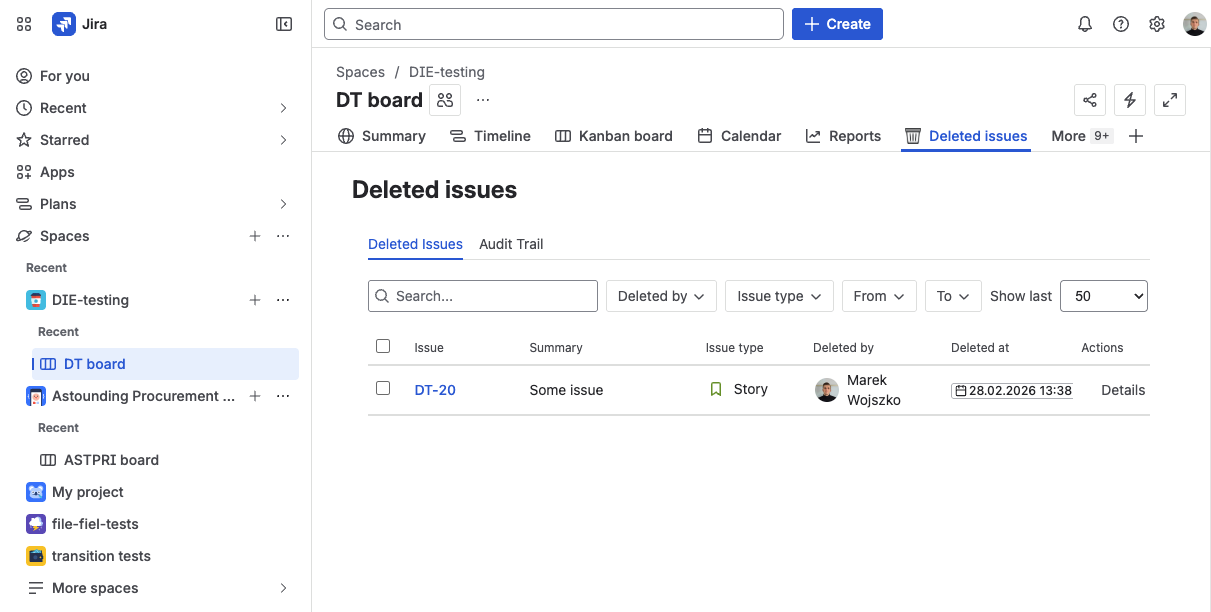
Open the detail view
Click the deleted issue row to open the full snapshot.
The detail view shows everything captured at the time of deletion: all standard and custom fields, the description, comments, worklogs, issue links, subtasks, and retention countdown.
Use this view to assess whether the issue is worth restoring and whether the snapshot is complete enough.

Restore the issue
Click Restore in the detail view header.
The restore modal opens — choose which parts of the snapshot to bring back.
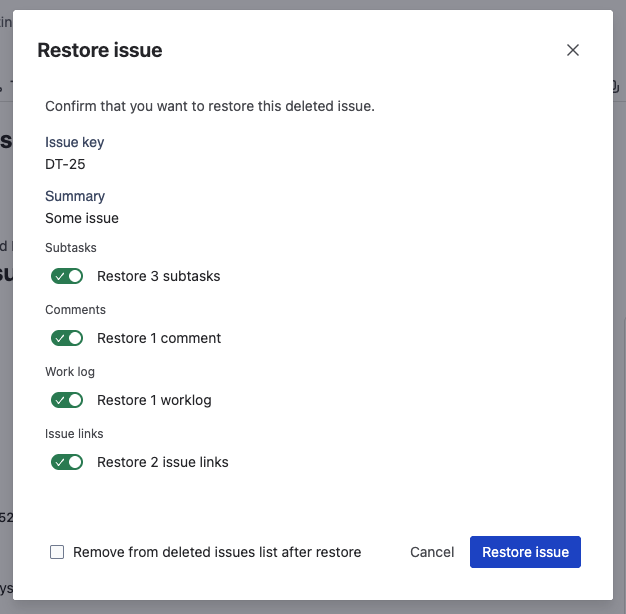
Each option is on by default and can be toggled individually:
- Comments — restore comments with original author attribution
- Worklogs — restore time log entries
- Issue links — restore links to other issues
- Subtasks — restore subtasks as child issues
Click Restore to confirm. The app creates a new issue in Jira and populates it with the selected data.
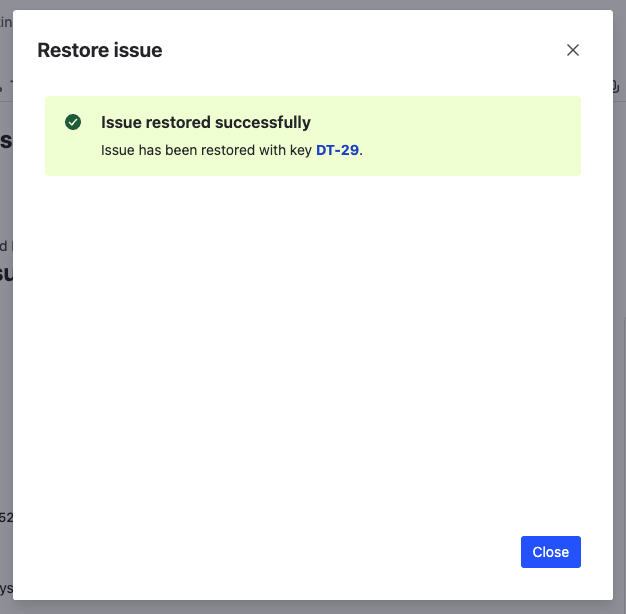
That's it — the issue is back in Jira.
You're all set
Every issue deleted in your tracked project is now captured automatically. No further setup required.
The app runs silently in the background from here on — no maintenance, no manual triggers. Here's what's active right now:
- Automatic capture — every deletion in tracked projects is recorded the moment it happens
- Full snapshots — all fields, description, comments, worklogs, and metadata preserved at deletion time
- Searchable history — the record grows with every deletion, filterable by project, user, date, and type
- Audit Trail — every action logged automatically for compliance and governance
When something goes wrong — a bulk delete, an automation error, a team member cleaning up — you have everything you need to recover. Open the Deleted Issues panel, find the record, and restore in seconds.
What's next?
- Configure Tracked Projects — manage which projects are protected
- Tracking Profiles — Basic vs Extended — choose the right depth for each project
- Restore an Issue — full guide to restore options and results
- Bulk Restore — recover multiple deleted issues at once