Ready-to-go Templates
Don't build every template from a blank issue. Templify ships with a built-in gallery of curated starter packs — ready-made templates grouped by team, complete with their issue hierarchy, field values and pre-configured dynamic fields. Open a pack, pick a template that fits, choose where it should live, and Templify creates it for you as a fully working, reusable template.
Estimated time: 1–2 minutes · Role: Jira user with the Manage Templates permission
Why use it
- Start in seconds — skip the blank page and begin from a proven structure
- Learn by example — see how hierarchies, field values and dynamic fields fit together before building your own
- Consistent foundations — adopt best-practice structures instead of reinventing them per team
- It's yours immediately — what you create is a normal Templify template you can edit, rename and configure like any other
How it works
You open the gallery from your Issue Templates page, point a template at one of your projects, and create it. Templify shows you exactly what the template contains before anything is created — and afterwards the new template appears in your list, ready to use.
Create a template from the gallery
Open the gallery
On the Issue Templates page, click Create from gallery.
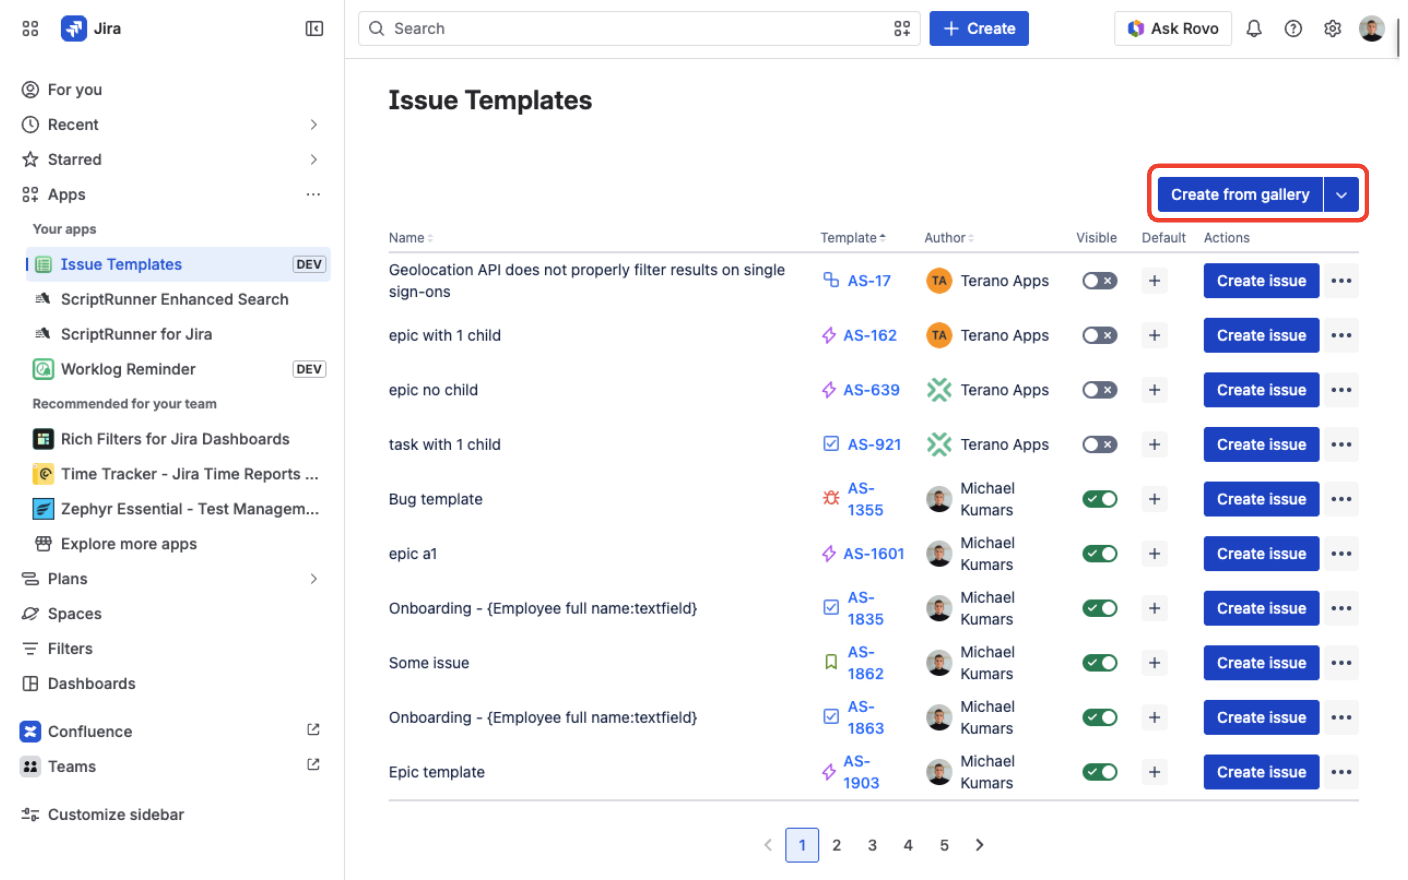
Create from gallery button on the Issue Templates page
Open a template pack
The gallery shows the available packs as cards, each with a short description and the number of templates inside. Click a pack to open it.
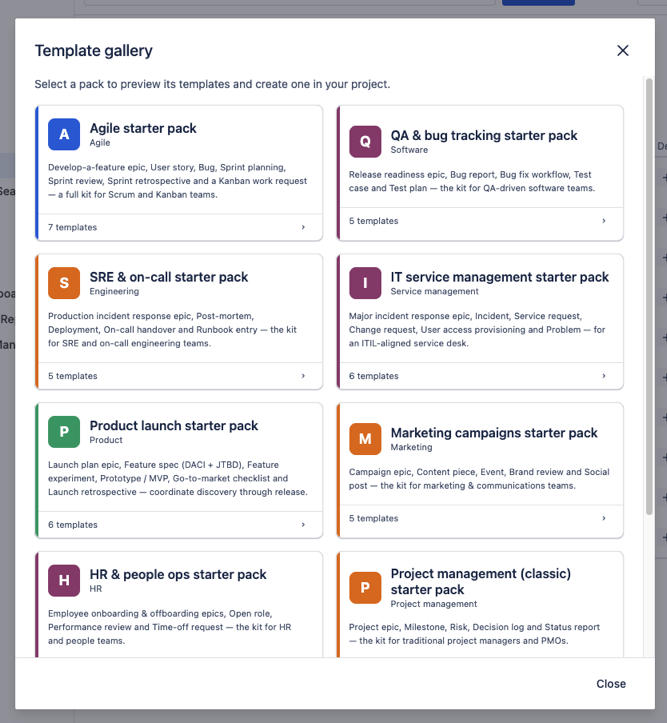
Template gallery with starter pack cards
Choose the target project
Pick the project where the template — and all of its issues — will be created.
Templify checks the chosen project and only offers the templates whose main issue type exists there. If some templates don't fit, you'll see a short note that a few were hidden; if none fit, you'll see a "No templates fit this project" message. Pick a different project, and the list updates.
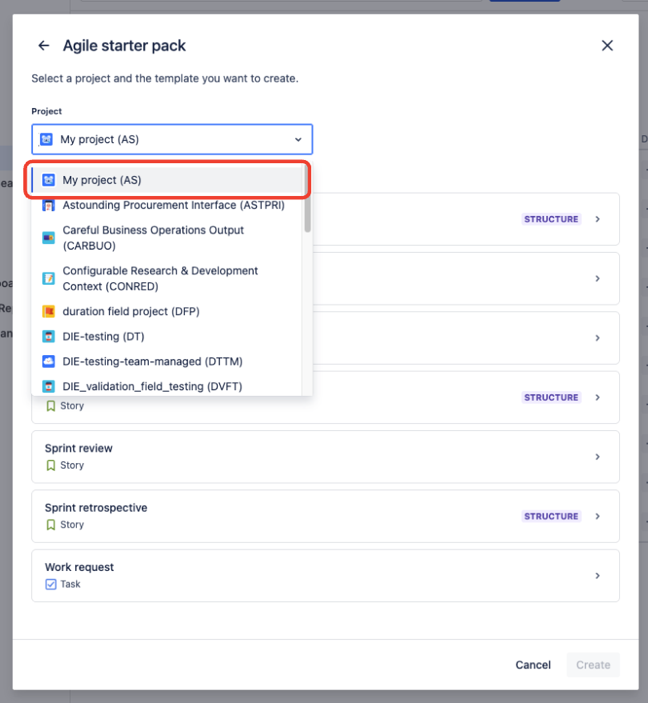
Choosing a target project for a gallery template pack
Select a template and review the preview
Select the template you want. Templify shows a preview of what it will create: the field values and the full issue tree — parent issue, sub-issues and subtasks — with each issue type's real Jira icon.
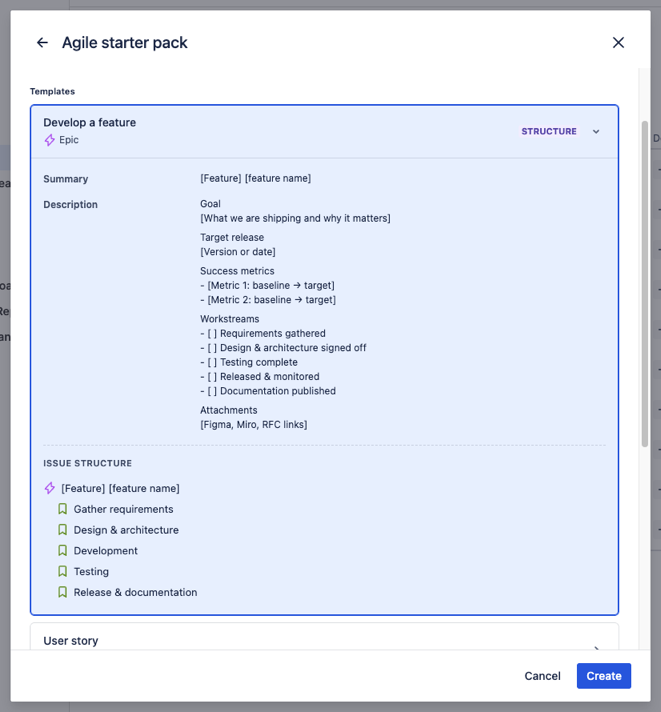
Template preview with field values and issue structure
Create
Click Create. Templify creates the issues in your project, restores the links inside the hierarchy, and registers the result as a new template. A result screen confirms what was created, with a View action that opens the new issue in Jira.
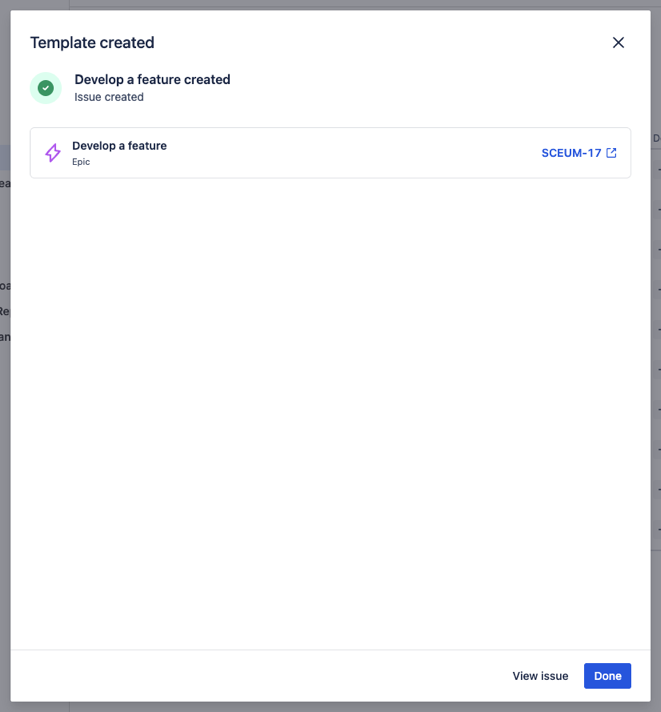
Result screen after creating a template from the gallery
What gets created
Creating from the gallery does two things at once:
- Real Jira issues. The full hierarchy — parent issue, sub-issues and subtasks — is created in the project you chose, with the template's field values and the links between those issues.
- A reusable template. The new parent issue is saved as a Templify template and appears in your Issue Templates list right away. From there you can use it with Create from Template, the create-form picker, or as a default per project — exactly like a template you built by hand.
If part of a template doesn't fit the target project — for example a child issue type or a field that doesn't exist there — that item is skipped and listed in the result, and everything that did fit is still created. Nothing is silently lost.
What you'll find in the gallery
The gallery ships with 9 starter packs, each a set of related templates tuned for a particular team. Templates come with ready-made descriptions — checklists, sections and fields to fill in — and many include dynamic fields resolved at create time (such as the current sprint, today's date, or the creating user as Assignee or Reporter).
| Pack | For | Templates |
|---|---|---|
| Agile starter | Scrum and Kanban teams | 7 — a feature Epic with phased Stories, plus User story, Bug, Sprint planning / review / retrospective, and a Kanban work request |
| QA & bug tracking starter | QA teams | 5 — a release-readiness Epic, bug report and fix workflow, test case and test plan |
| SRE & on-call starter | SRE and on-call engineers | 5 — incident response Epic, post-mortem, deployment, on-call handover, runbook entry |
| IT service management starter | ITIL service desks | 6 — major-incident Epic, Incident, Service request, Change request, access provisioning, Problem |
| Product launch starter | Product teams | 6 — launch-plan Epic, feature spec, experiment, prototype/MVP, go-to-market checklist, launch retrospective |
| Marketing campaigns starter | Marketing and comms teams | 5 — campaign Epic, content piece, event, brand review, social post |
| HR & people ops starter | HR teams | 5 — onboarding and offboarding Epics, open role/requisition, performance review, time-off request |
| Project management (classic) starter | Classic PM and PMO | 5 — project Epic, milestone, risk, decision log entry, status report |
| Sales & CRM starter | Sales and account management | 5 — sales-opportunity Epic, lead, account plan, proposal, QBR |
Open the gallery to browse each pack and preview its templates in full.
Good to know
- You need the Manage Templates permission to create from the gallery — see Permissions.
- Each create is independent. Creating from the same pack again makes a fresh copy — both the issues and the template — rather than updating anything you created before.
- Incompatible items are skipped, not blocking. A missing child issue type or field is reported; the rest is still created.
- Some gallery templates ship with dynamic fields already configured — see Dynamic Fields for how those behave.
- Every create from the gallery is recorded in Audit Logs: who, when, and a summary of what was created and skipped.
FAQ
Can I create a whole pack at once?
Not today — you create one template at a time. Open the pack, choose a template, and create it; repeat for any others you want from the same pack.
Why can't I see some templates after picking a project?
Templify hides templates whose main issue type doesn't exist in the project you chose, so you don't create something the project can't hold. Pick a different project and the list updates. If a template's child issue types or fields are missing, the template still appears — those items are simply skipped and listed in the result.
Can I edit a template after creating it from the gallery?
Yes. What you create is a normal Templify template and a normal set of Jira issues. Rename it, change field values, adjust the hierarchy or reconfigure its dynamic fields — just like any template you built yourself.
How is this different from Import / Export?
The gallery is a built-in catalog you create from in a couple of clicks — no file to manage. Import / Export is for moving a template you already have between Jira sites using a portable file. Both end up creating issues and registering a template; they differ in where the content comes from.