Quick Guide
Get up and running with Templify in under 10 minutes. This guide walks you through the complete flow — from installation to your first template in action.
Estimated time: 5–10 minutes · Roles: Jira Administrator (setup) + any Jira user (usage)
How Templify Works
Step 1 — Install Templify
Install Templify from the Atlassian Marketplace:
Go to the Atlassian Marketplace
Open the Templify listing on Atlassian Marketplace and click Try it free.
Select your Jira Cloud site
Choose the site where you want to install Templify and confirm the installation. Jira Admin permissions are required.
Wait for installation to complete
Installation takes under a minute. Once done, Templify appears in Jira Settings → Apps → Manage Apps.
Skip to Step 2 if Templify is already installed on your site.

Step 2 — Run Initial Setup
Initial setup is performed once by a Jira Administrator. It configures the app so all features work correctly.
You need Jira Administrator global permission to complete this step.
Navigate to the Templify configuration panel:
Jira Settings → Apps → Manage Apps → Templify (in the left sidebar under App settings)
Set up a Global Template Repository (recommended)
Choose a dedicated Jira project to store your shared templates. This makes templates available across all projects and keeps them organized in one place.
→ Full details: Global Repository
Create the Issue Template field
Templify creates a custom Jira field used to display a template picker on the Create Issue form. The configuration wizard guides you through field creation and screen assignment automatically.
→ Full details: Configure Issue Template Field
Configure permissions
Grant the appropriate global permission to your user groups so they can create and manage templates.
→ Full details: Permissions
The interactive demo below walks through the entire initial setup:
Step 3 — Create Your First Template
An Issue Template in Templify is a regular Jira issue that you mark as a template. It stays in your project like any other issue — Templify just adds metadata and configuration on top.
Choose a well-structured issue that reflects your team's standard. It should already have a meaningful summary, description, labels, and any other fields your team fills in regularly.
Open any Jira issue
Navigate to the issue you want to use as a template. This can be any issue type — Task, Story, Bug, Epic.
Find the Templify panel
On the issue view, click "View app actions" and select Issue Templates. The Templify — Issue Templates panel will appear.
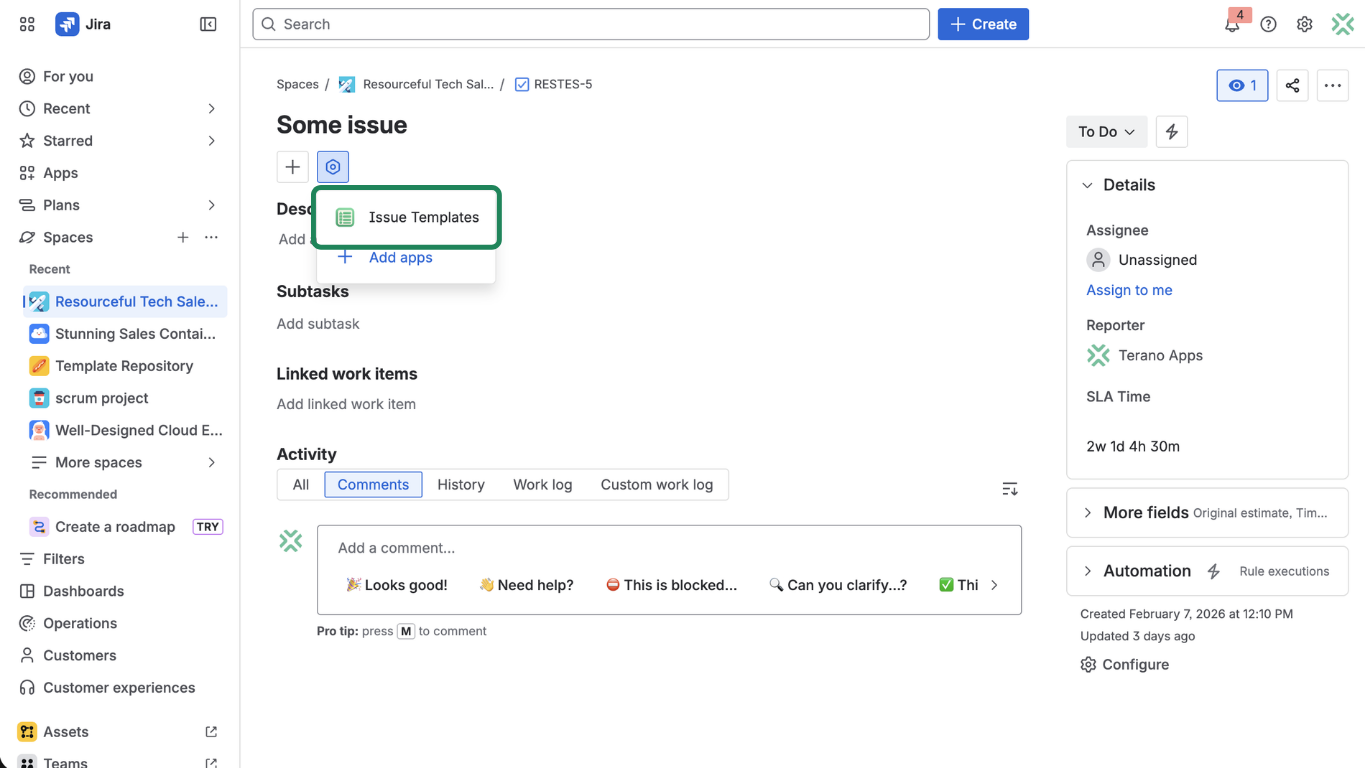
Click "Mark as Issue Template"
Toggle the issue to template mode. Templify adds configuration options specific to templates.
Configure template settings (optional)
- Name — give your template a friendly display name
- Visibility — set which projects can see this template
- Fields — configure which fields should be included and which should be skipped
- Dynamic fields — set dynamically computed values (e.g.
today + 7dfor due dates)
Step 4 — Use Your Template
Once an issue is marked as a template, it can be used in three ways. Choose the one that fits your team's workflow — or combine all three.
- Create from Template
- Select in Create Form
- Auto-Fill by Default
Best for: Project kickoffs, onboarding checklists, recurring issue structures (Epic with children)
This is the most direct way to use a template. You open the template issue and click "Create from Template" — Templify instantly generates a new issue (or entire hierarchy) with all fields pre-filled.
Open the template issue
Navigate to the Jira issue you marked as a template in Step 3.
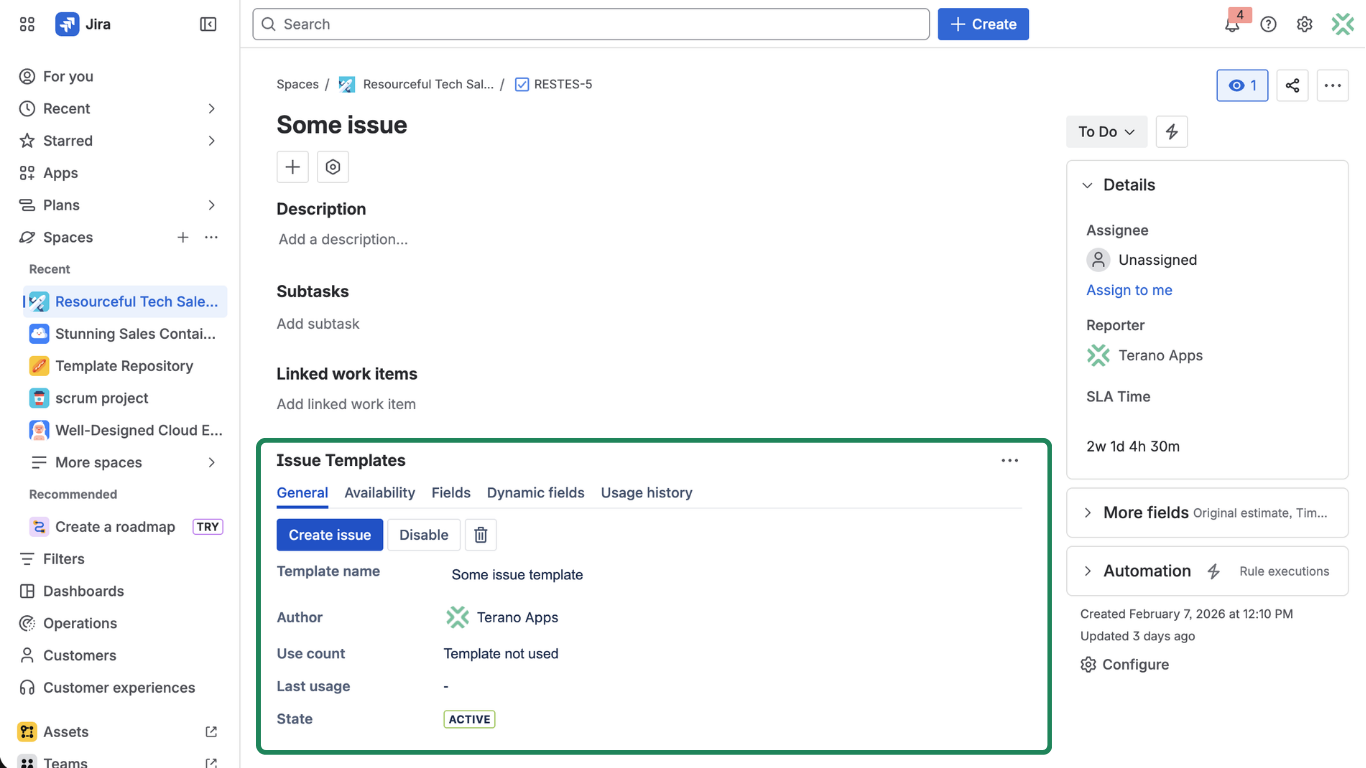
Click "Create issue" in the Templify panel
The button is visible on the right sidebar in the Templify — Issue Templates panel.
Review and confirm
Templify opens a preview of the new issue (and child issues if hierarchy is configured). Confirm to create. You can also check the full creation history directly from the template issue at any time.
→ Full details: Create Issue using Template
Best for: Teams where users choose the right template for each situation at creation time
With this approach, users see a template picker dropdown directly on the native Jira Create Issue form. Selecting a template immediately fills in all fields — no need to navigate to the template issue first.
This requires the Issue Template field to be configured by an Administrator (Step 2). The field only works on the Global Create Issue form — opened via the top navigation bar or the C keyboard shortcut.
Open the Global Create Issue form
Press
Canywhere in Jira, or click the Create button in the top navigation bar. Do not create from a board or backlog — the template field only appears in the global form.Select a template from the dropdown
Click the Issue Template field and choose from the available templates for the selected project and issue type.
Review the auto-filled form
After selecting a template, all fields are populated automatically. Review the content, make any adjustments, and click Create.
→ Full details: Select Template in Create Form
Best for: Standardized teams where everyone should start from the same structure, with no extra clicks
With this approach, a Jira Administrator assigns a template as the default for a specific project + issue type. When any user opens the Create Issue form for that combination, the fields are pre-filled automatically — before the user sees the form.
The user doesn't select anything. The form simply opens with values already filled in, based on the configured default template.
Configure the default template
Go to Apps → Issue Templates and assign a template to a project + issue type combination.
Any user opens the Create Issue form
Press
Cor use the Create button. Select the project and issue type that has a default template configured.Form auto-fills in the background
Templify detects the project + issue type combination, loads the default template, and pre-populates all fields instantly after open.
→ Full details: Auto-Fill Fields with Default Template
You're All Set
You've completed the core Templify workflow. Here's a summary of what you can do next:
Explore more features
- Create Issue Hierarchies — generate Epics with Stories and Sub-tasks in one click
- Dynamic Fields — use expressions like
today + 7dfor due dates - Jira Automation — trigger template creation from automation rules
Configure & manage
- Template Availability — control which projects see which templates
- Permissions — manage who can create and apply templates
- Audit Logs — review template usage history across your org
All three approaches work side by side. For example: set a default template for your most common issue type, and still allow users to pick a different template from the dropdown when needed.