Quick Guide
This guide takes you from an empty project to a working File Field in three steps. An administrator adds the field and sets the upload rules once; after that, anyone on the team can attach files to issues and portal requests.
Estimated time: 5–10 minutes · Role: Jira Administrator (steps 1–2), any user (step 3)
How it works
Step 1 — Add the field to a project
File Field is a native Jira custom field, so you add it the same way you add any custom field.
- Go to Jira Settings (cog icon, top right) → Work items → Fields.
- Click Create new field and choose the File Field type.
- Give it a clear, single-purpose name (for example, Signed Contract or Proof of Identity) and select the screens where it should appear — typically the create, edit, and view screens of the relevant issue types.
Once it's on a screen, the field appears on the issue view, on the create-issue form, on workflow transitions that use that screen, and on the matching Jira Service Management portal request.
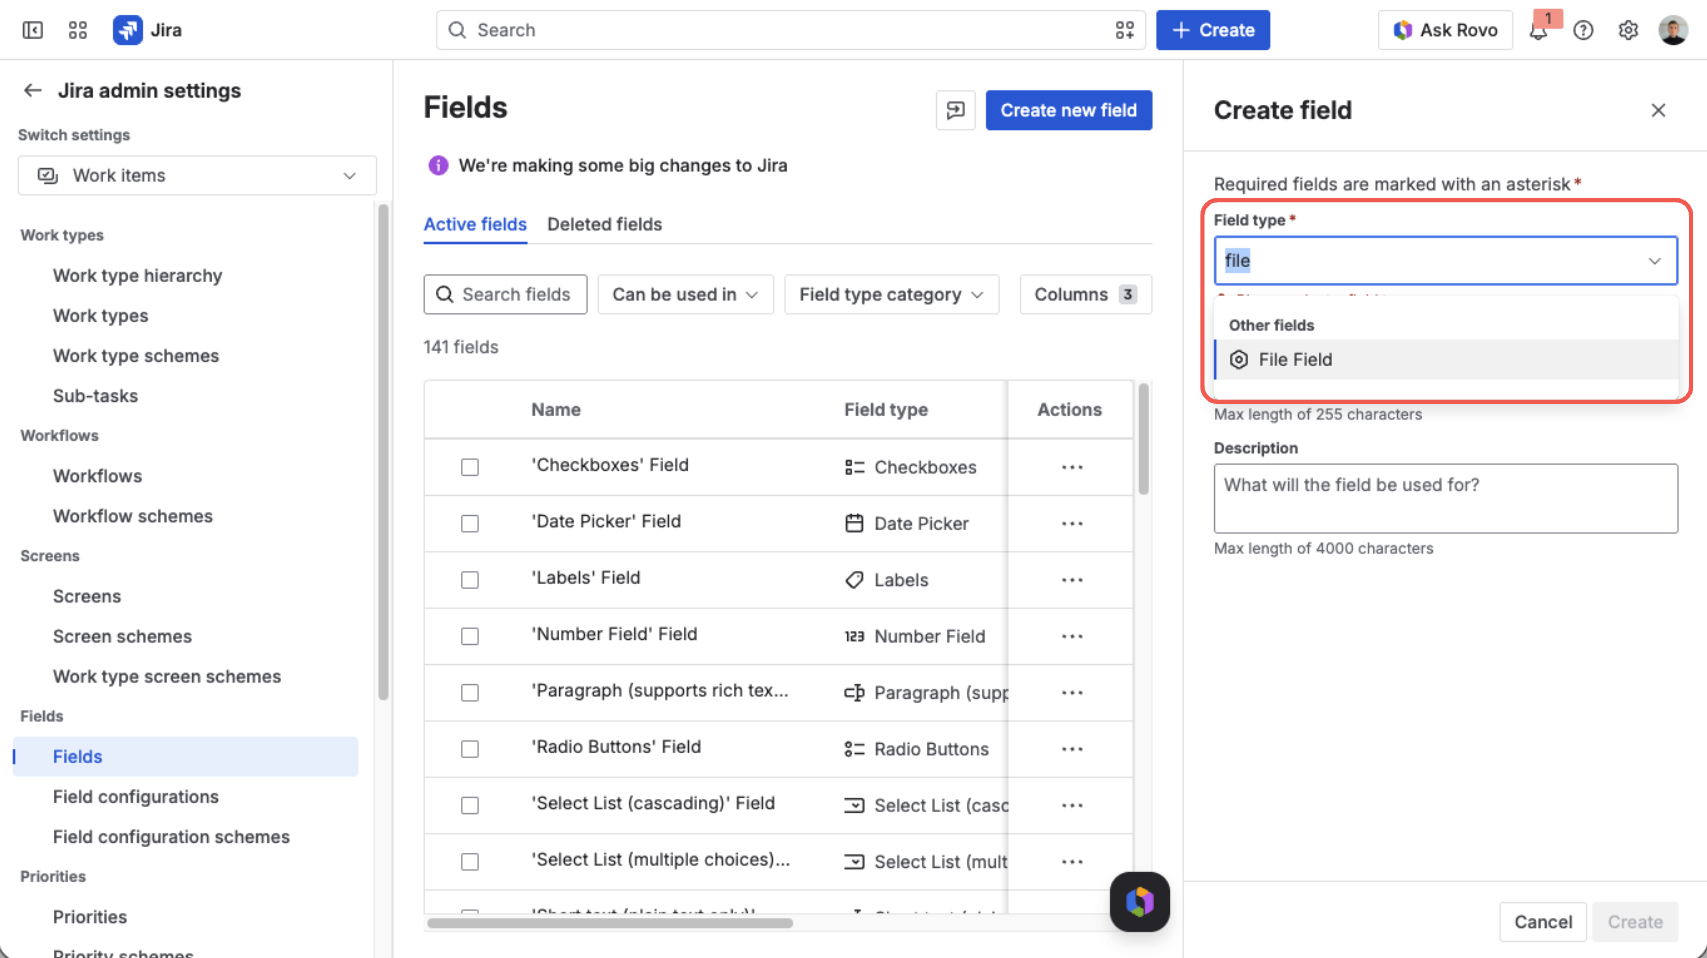
Search the field type list for “File Field” and select it
For the full walkthrough — including field contexts — see Add the Field to a Project.
Step 2 — Set the upload rules
Each field context has its own upload policy. Open the field's configuration to decide what people are allowed to attach:
- Allowed file types — pick from the built-in list (PDF, images, Word, Excel, CSV, ZIP, and more), or leave it empty to allow any type.
- Maximum number of files — how many files one field can hold. The default is 20.
- Maximum file size — the largest a single file can be, in B, KB, MB, or GB. The default is 100 MB.
Add a screenshot of the field context configuration form.
For details on each setting — and how to apply different rules to different projects — see Set Field Configuration.
Step 3 — Attach your first file
Now switch to a normal user's view and try it out.
- Open any issue that has the field on its screen.
- In the File Field, select one or more files from your computer.
- The files are checked against the upload rules and, if they pass, uploaded right away. There is no separate Save button — the field saves automatically.
Each file appears as a card showing its name, type, and size, with Download and Delete actions. The most recently added files are listed first.
Add a screenshot of an attached file with its name, type, and size.
Where to go next
- Admins: Set Field Configuration and Make the Field Required
- Everyone: Attach, Download & Delete Files and Use on the JSM Portal
- Curious about storage and access? Data & Security